Thursday, May 31, 2012

Entry Way and Laundry - Part 3, FINISHED!

After a long 8 months this project is finally finished and I have to show off the final product...

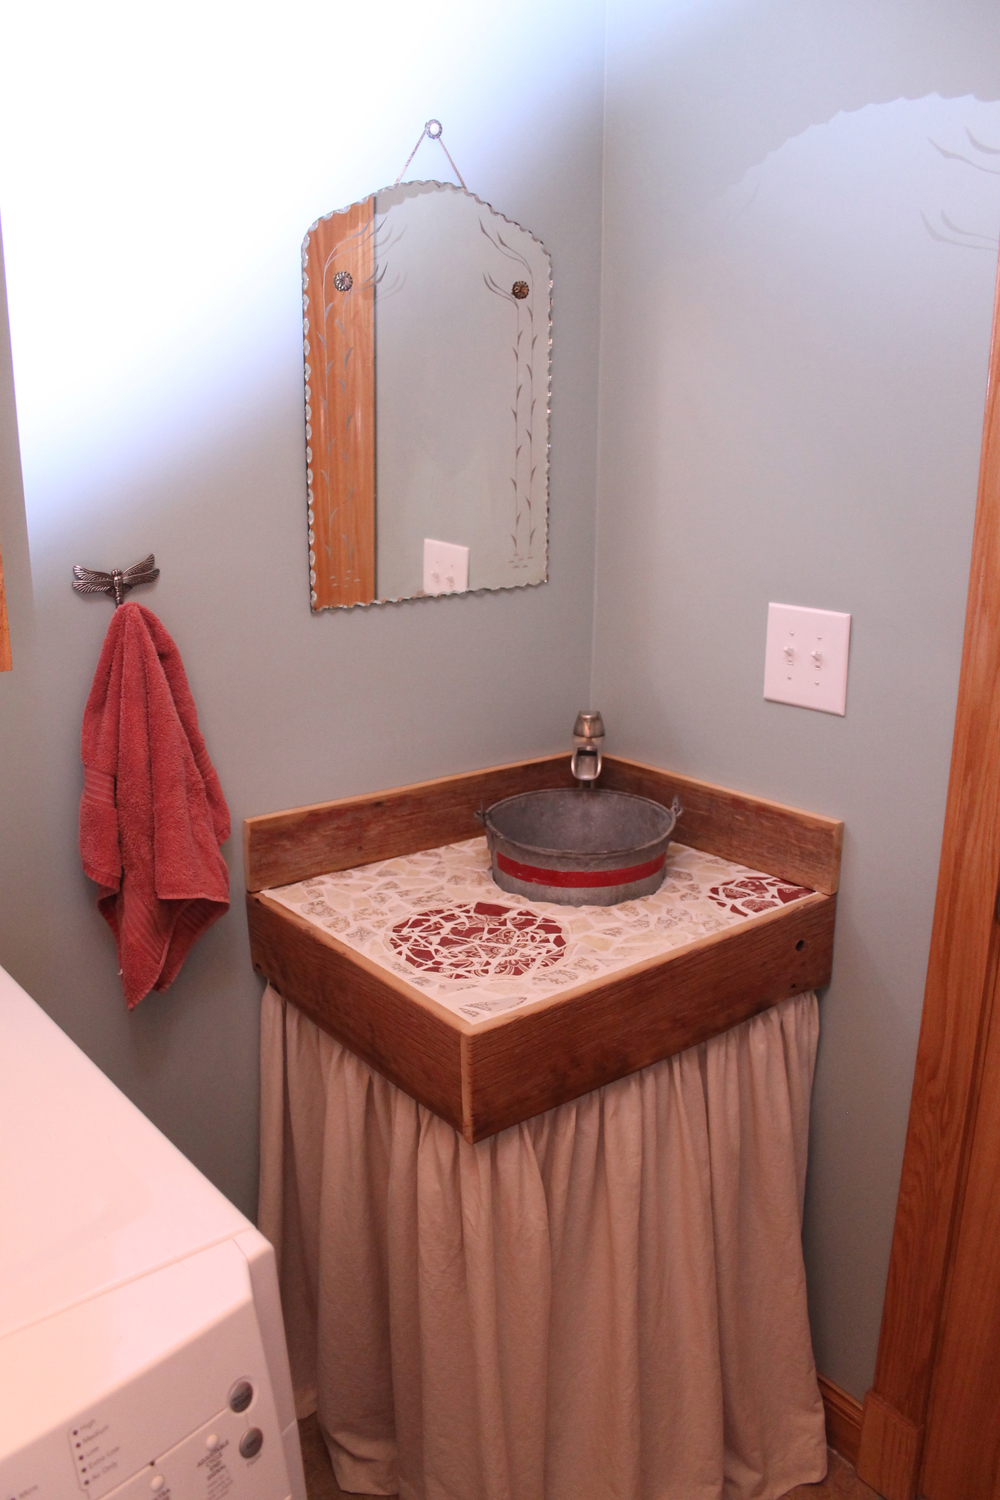
Laundry Room:  The sign is hand painted, the cupboards are basic off the shelf cupboards from a home improvement store, my great aunt's buttons were used on the curtain (a fun collection she had) and old barn boards were used for the shelving...


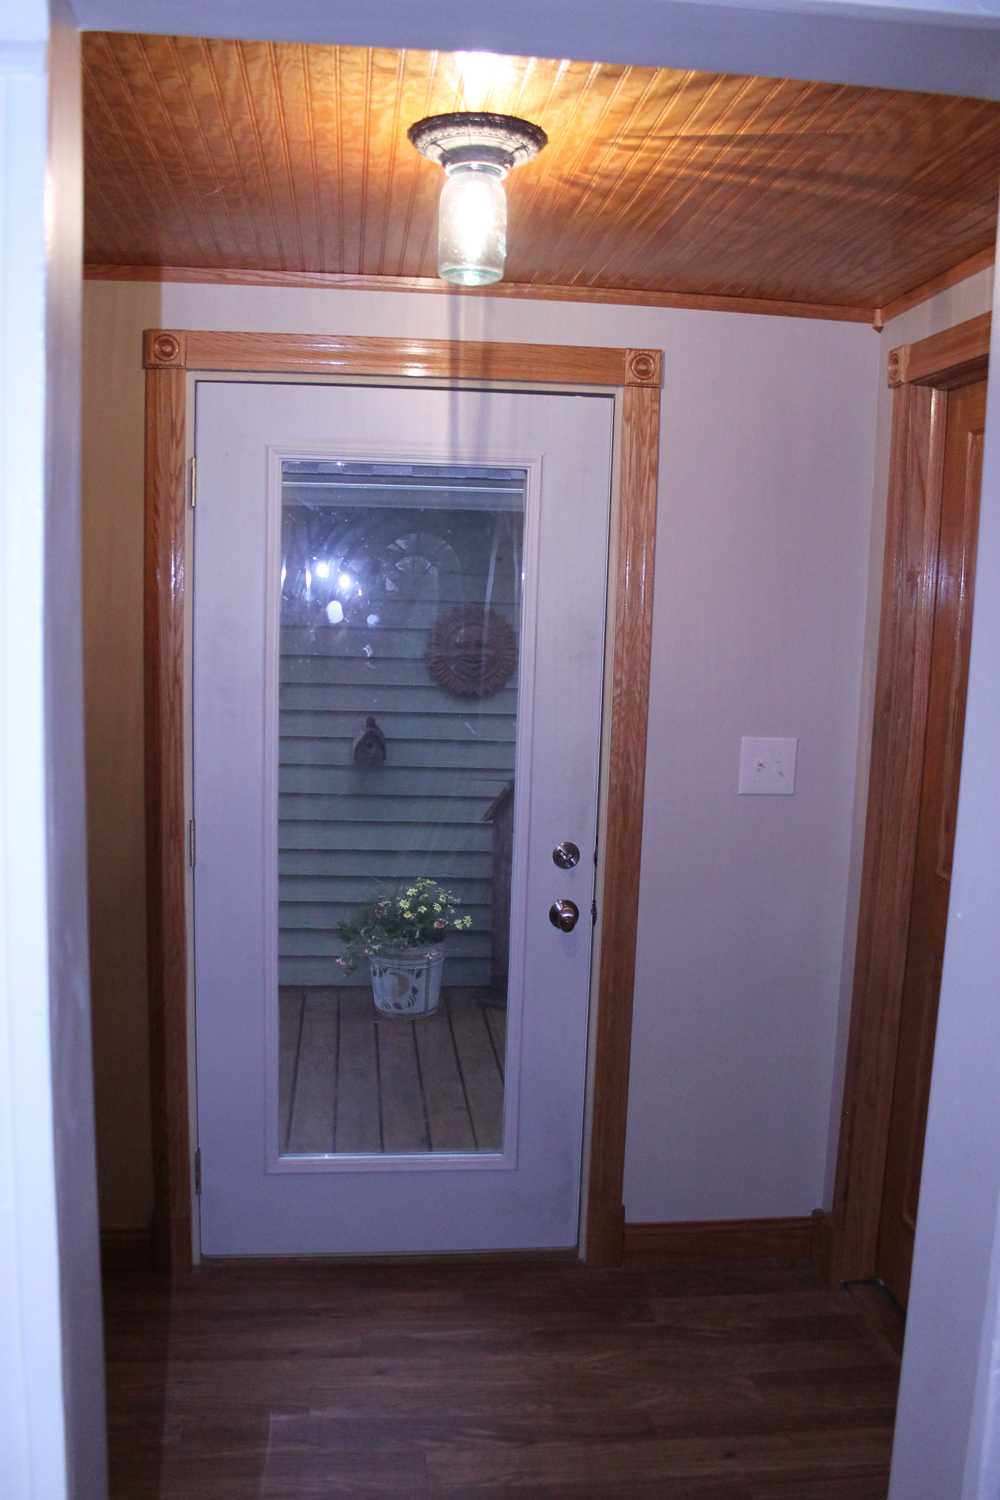
Entry Way:  what a HUGE transformation.  Remember, we moved over the door and used a full glass door to bring in more light.  The floor looks like a real wooden floor but it's linoleum.  3"x4' planks that I found at the local Habitat for Humanity ReStore.  This would allow me to have the look of wood but less maintenance when it comes to country mud and winter months.  The light fixture is a vintage base and a Mason jar.  Where the old entry door was is now our closet/entry to our basement.  This entry way is now much more user friendly!


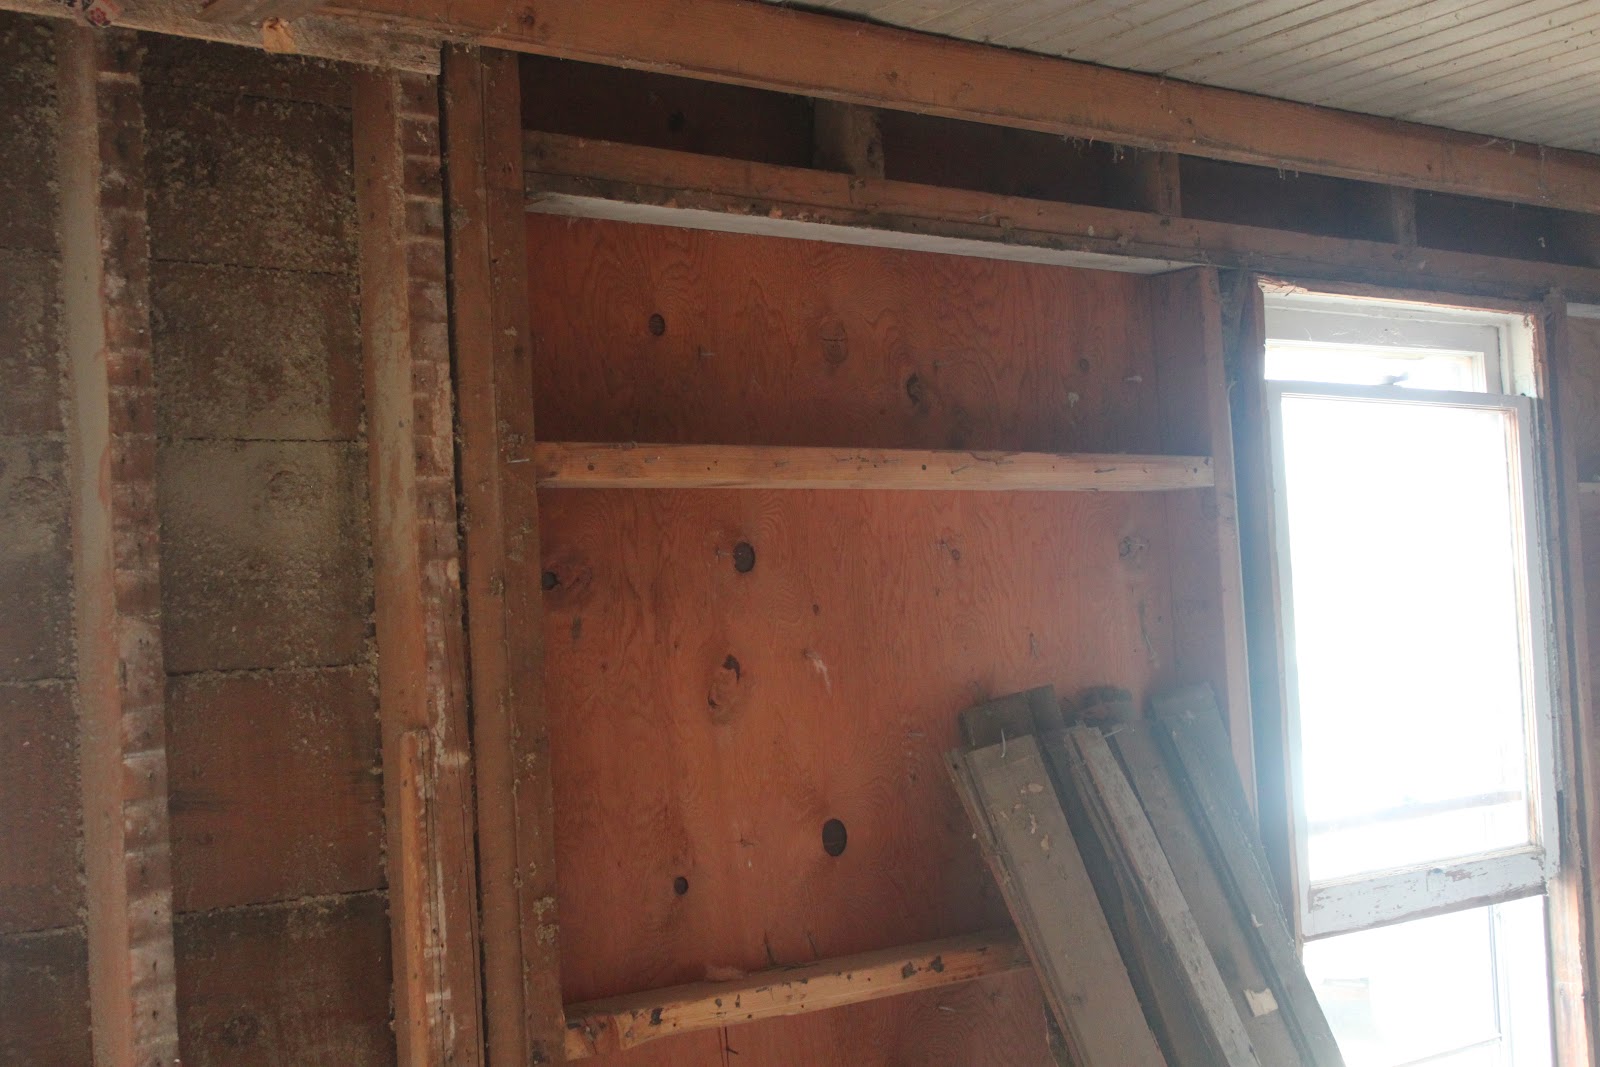
Just think, it all started with just simply removing the old wall wooden paneling and replacing it with drywall, simple right?  The goal was to have it ready by our son's graduation and we did it!  Thanks to my hubby, brother Darren in moving electrical wires and our friend Andy on properly installing the entry door!


Egg Wire Basket Light Fixture

I wanted to try something different for a light fixture.  Many years ago I saw a picture of an egg wire basket used as lighting.  Again, my Mom found this egg basket at an auction for $1.00.  We already had this simple light fixture that was removed from one of our bedrooms so I spray painted it to look rusty, to match the wire basket.


How many people does it take to install a wire basket light fixture?  Two, definitely two!


My husband found an Edison light bulb and it looks great!


Wednesday, May 30, 2012

Bucket Sink

I wanted something a little different for a sink so why not a bucket?  So I proceeded to explain what I wanted to do to my husband and Mom, both gave me a funny look.  Mom to the rescue as she brought me four old galvanized buckets to choose from.  Then I asked my husband to see if he can attach a drain to the bottom of the bucket.  Lucky me as my husband is a Plumber by trade so this was pretty easy to do.


Since I wanted a bucket as a sink, I knew I would have to make my own counter top.  I've seen pictures  of broken plates being within a mosaic pattern.  I spent a couple weeks trying to find plates at second hand stores that I could break up as mosaic pieces.  Now that I found my supplies, I started to bust them up and paste them on a piece of 3/4 plywood.  Once done, I then grouted and placed it on a simple 2 x 4 frame my husband built.  I then sealed all of the grout lines.


We found a faucet that reminded us of a old fashion water pump.  Once my husband hooked everything up I was able to trim it out in old red barn boards and then added a linen skirt.  


I hung a vintage mirror I was given by my husband's grandmother.  I had my whole family scratching their heads on how it was going to turn out and I think I surprised them.  I just love it!!

Monday, May 28, 2012

Chalkboard Message Station

I found this old cabinet door at the local Habitat for Humanity ReStore.  It kept calling my name so after paying a $1.00, away I went and then started to think what I could do with it.  A message board is what popped in my head.  A little burnt orange paint, chalkboard paint, cork board and a cabinet handle from Hobby Lobby to hold my chalk and wala!


Entry Room and Laundry - Part 2

After a little head scratching and finding out that the laundry room was actually an outside porch converted over, we had no other choice than to correct the problems.  We decided to tear down to the bare studs, yes that's right, remove the siding and sheathing and all that was left was us looking out into our yard.  My husband changed the horizontal studs back to the proper vertical studs, new window, new wall dividing the entry way and laundry room.


It took a little bit to figure out how to finish the ceiling but once we found out the laundry room was actually a porch at one time, why not make the ceiling beadboard.  So from that point, we decided to incorporate a farmhouse feel in our decor.


I first want this to be noted, I have lived with painted woodwork for the past 20 years and if I have to replace any woodwork, it will NEVER be painted.  Don't get me wrong, painted woodwork can look beautiful and sharp looking.  I don't know if my family is rough on woodwork but I cannot stand seeing nicks in woodwork or repainting woodwork to freshen up the paint.  So with that being said, it's now hours of staining and poly-urethaning all of the wood.


We decided to make it easier on us and use sheets of beadboard plywood.  Putting up sheets is SOOO much easier and faster than the individual boards, then the normal insulation and drywall.  I don't know about you but drywalling is the worst part of remodeling.  Mud, sand, mud, sand and mud, sand two more times seems to take forever.  If you don't get everything smooth as silk then it looks like a crap job!


Now that all of the icky work is done, putting on the paint is the fun part for me!  


I can't wait to show you some of the fun projects we incorporated in the rooms.  Come back for a peak...

Sunday, May 27, 2012

Entry Room and Laundry - Part 1

Last summer I told my husband that we should make simple updates to our back, "main",  entryway and also update our laundry room which also serves as a half bath so things will look nice during our son's graduation party.  We live in a 100 year old farm house, lived in by renters and farm hands so you can imagine the care it was given.  It can't take much to take off old tongue/grove wooden siding and replace it with drywall, right?  The door and window was placed where ever it would fit.  This entryway points to the north and had improper insulation, WOW it was cold in the winter.


As with a lot of farm houses, they were not designed to help people move furniture into the house easily.  You cannot see it but across from the back door is the entry point to our basement.  Our plans are to move the door to where the window  is located and build a wall to enclose the old entry and create a small closet and the entry into the basement.  This would allow us to move anything into the house with a straight shot.  Still everything seems pretty straight and forward.  Then we tore into the laundry room.


With most old houses, the walls were lath and plaster.  So my husband took on the task of taking it all down.  There was blown in insulation, but only in certain cavities so all of this was removed.


As he reached the east end of the room, my husband discovered the sheathing was fiber board, great!


Then as he pulled boards down on the north side, SURPRISE, the wall studs were horizontal, REALLY!  Now the fun begins!!!  Check out my next post to see what we had to do...

I've been wanting to start my own blog for the past year but when you have a child that is a senior in high school and two others that are just as active, your wants are pushed aside for just a little longer.  Now that summer vacation is here, it was my time to have fun.  While we were getting ready for the graduation party, we had some great projects we tackled and I want to share them with you.  Stay tune!